
My personal laptop is a 13” Macbook Pro. Since I do a lot of software development work on my Mac, I often need to copy file paths. Unfortunately, it’s not easy to get file paths directly from Finder. Newer versions of macOS no longer include the path in the “Get Info” window. It is possible to get file paths from Terminal, either using “cd” and “ls” commands or by dragging files from Finder, but using Terminal is not always convenient.
Recently, I discovered how to make it easy. Using Automator, I added a “Copy Path” action to the right-click (or “secondary-click”) menu that will copy the absolute file path to the clipboard! This makes it very easy to get file paths directly from Finder. I learned this method by reading an OS X Daily article, and since it was so useful, I decided to share it here.
My Mac
The following steps were run on my personal Mac, which has the following specs:
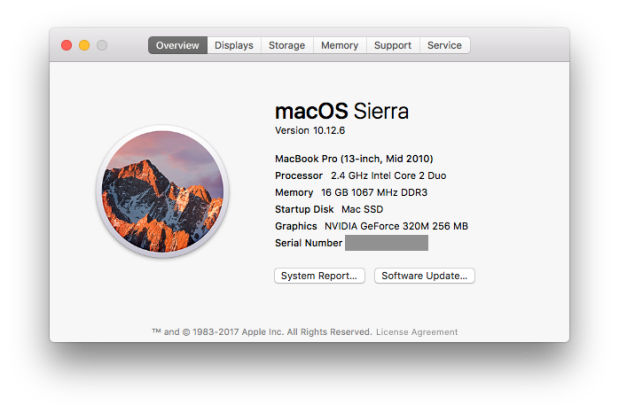
It’s older than today’s kindergartners, but it still works reasonably well. I upgraded to 16GB memory and SSD storage.
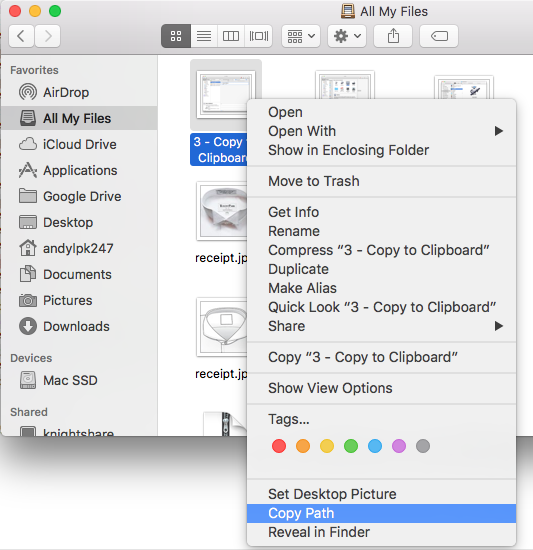
The Steps
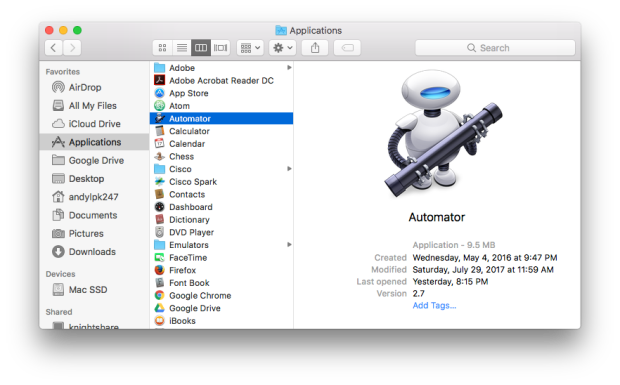
Launch Automator. (It’s in the Applications folder.)
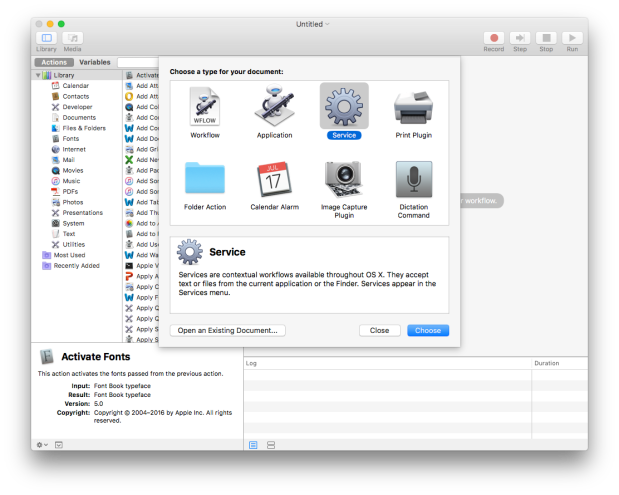
Create a new service by navigating to File -> New and selecting Service from the dialog box.
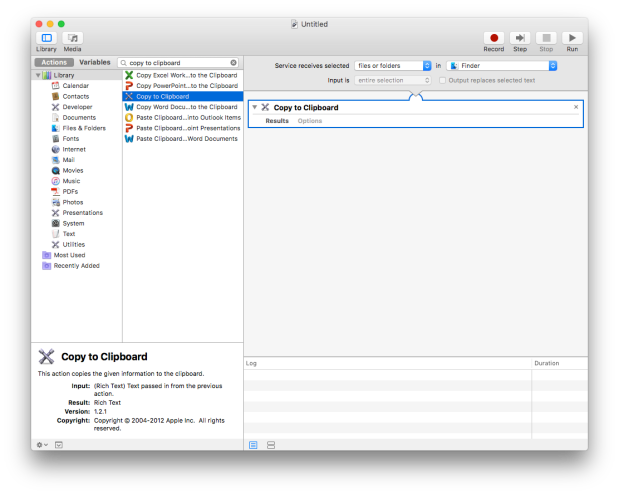
Under Actions, search for “Copy to Clipboard”, and drag it to the right side of the panel. Set “Service receives selected” to “files or folders” and “in” to “Finder”.
Save the service with a name like “Copy Path”. Close Automator and open Finder. Right-click (or “secondary-click”) on any file – you should see the name of the new service as an available action. When you select it, the absolute file path is copied to the clipboard! You can then paste it (Cmd-V) into any text area.
This new action has been very helpful to me while programming. I hope you also find it helpful!

This is helpful, thanks!
LikeLike
Worked. Nice one! Precise steps! Was looking for this since a while. Thanks
LikeLike
I’ve used this a couple years back and I just used it again (setting up a new MacBook). Thanks for making this available and sharing it with the world. 🙂
LikeLike
I think I came across the very same blog post a couple years back when I set up an older Mac, I just used it again setting up a new one. Just as handy now as it was back then – thank you for sharing it with the world! 🙂
LikeLike
Used this a couple years back when I set up an iMac, just used it again working on a MacBook Pro. Just as handy now as it used to be – thanks for sharing it with the world! 🙂
LikeLike
Does anyone know how to edit the path before it’s copied? I use Dropbox and would like to truncate the pathname to remove everything before “/Dropbox”
LikeLike
Thanks works well except I can’t select/edit the path from the clipboard. Using Macbook Air Sequoia 15.6.1
LikeLike