A friend recently asked me this question (albeit with some rephrasing):
Can a unit test be a performance test? For example, can a unit test wait for an action to complete and validate that the time it took is below a preset threshold?
I cringed when I heard this question, not only because it is poor practice, but also because it reflects common misunderstandings about types of testing.
QA Buzzword Bingo
The root of this misunderstanding is the lack of standard definitions for types of tests. Every company where I’ve worked has defined test types differently. Individuals often play fast and loose with buzzword bingo, especially when new hires from other places used different buzzwords. Here are examples of some of those buzzwords:
Unit testing
Integration testing
End-to-end testing
Functional testing
System testing
Performance testing
Regression testing
Test-’til-it-breaks
Measurements / benchmarks / metrics
Continuous integration testing
And here are some games of buzzword bingo gone wrong:
Trying to separate “systemic” tests from “system” tests.
Claiming that “unit” tests should interact with a live web page.
Separating “regression” tests from other test types.
Before any meaningful discussions about testing can happen, everyone must agree to a common and explicit set of testing type definitions. For example, this could be a glossary on a team wiki page. Whenever I have discussions with others on this topic, I always seek to establish definitions first.
What defines a unit test?
Here is my definition:
A unit test is a functional, white box test that verifies the correctness of a single unit of software code. It is functional in that it gives a deterministic pass-or-fail result. It is white box in that the test code directly calls the product source code under test. The unit is typically a function or method, and there should be separate unit tests for each equivalence class of inputs.
Unit tests should focus on one thing, and they are typically short – both in lines of code and in execution time. Unit tests become extremely useful when they are automated. Every major programming language has unit test frameworks. Some popular examples include JUnit, xUnit.net, and pytest. These frameworks often integrate with code coverage, too.
In continuous integration, automated unit tests can be run automatically every time a new build is made to indicate if the build is good or bad. That’s why unit tests must be deterministic – they must yield consistent results in order to trust build status and expedite failure triage. For example, if a build was green at 10am but turned red at 11am, then, so long as the tests were deterministic, it is reasonable to deduce that a defective change was committed to the code line between 10-11am. Good build status indicates that the build is okay to deploy to a test environment and then hopefully to production.
(As a side note, I’ve heard arguments that unit tests can be black box, but I disagree. Even if a black box test covers only one “unit”, it is still at least an integration test because it covers the connection between the actual product and some caller (script, web browser, etc.).)
What defines a performance test?
Again, here’s my definition:
A performance test is a test that measures aspects of a controlled system. It is white box if it tests code directly, such as profiling individual functions or methods. It is black box if it tests a real, live, deployed product. Typically, when people talk about testing software performance, they mean black box style testing. The aspects to measure must be pre-determined, and the system under test must be controlled in order to achieve consistent measurements.
Performance tests are not functional tests:
Functional tests answer if a thing works.
Performance tests answer how efficiently a thing works.
Rather than yield pass-or-fail results, performance tests yield measurements. These measurements could track things as general as CPU or memory usage, or they could track specific product features like response times. Once measurements are gathered, data analysis should evaluate the goodness of the measurements. This often means comparison to other measurements, which could be from older releases or with other environment controls.
Performance testing is challenging to set up and measure properly. While unit tests will run the same in any environment, performance tests are inherently sensitive to the environment. For example, an enterprise cloud server will likely have better response time than a 7-year-old Macbook.
Why should performance tests not be unit tests?
Returning to the original question, it is theoretically possible to frame a performance test as a functional test by validating a specific measurement against a preset threshold. However, there are 3 main reasons why a unit test should not be a performance test:
Performance checks in unit tests make the build process more vulnerable to environmental issues. Bad measurements from environment issues could cause unit tests to fail for reasons unrelated to code correctness. Any unit test failure will block a build, trigger triage, and stall progress. This means time and money. The build process must not be interrupted by environment problems.
Proper performance tests require lots of setup beyond basic unit test support. Unit tests should be short and sweet, and unit testing frameworks don’t have the tools needed to take good measurements. Unit test environments are often not set up in tightly controlled environments, either. It would take a lot of work to properly put performance checks into a unit test.
Performance tests yield metrics that should not be shoehorned into a binary pass/fail status. Performance data is complex and rich with information. Teams should analyze performance data, especially over time. It can also be volatile.
These points are based on the explicit definitions provided above. Note that I am not saying that performance testing should not be done, but rather that performances checks should not be part of unit testing. Unit testing and performance testing should be categorically separate types of testing.
Lately, I’ve been doing lots of code reviews. I probably spend about an hour every work day handling reviews for my team, both as a reviewer and an author. All of the reviews exclusively cover end-to-end test automation: new tests, old fixes, config changes, and framework updates. I adamantly believe that test automation code should undergo the same scrutiny of review as the product code it tests, because test automation is a product. Thus, all of the same best practices (like the guides here and here) should be applied. Furthermore, I also look for problems that, anecdotally, seem to appear more frequently in test automation than in other software domains. Below is a countdown of my “Top 10 Gotchas”. They are the big things I emphasize in test automation code reviews, in addition to the standard review checklist items.
#10: No Proof of Success
“Trust, but verify,” as Ronald Reagan would say. Tests need to run successfully in order to pass review, and proof of success (such as a log or a screen shot) must be attached to the review. In the best case, this means something green (or perhaps blue for Jenkins). However, if the product under test is not ready or has a bug, this could also mean a successful failure with proof that the critical new sections of the code were exercised. Tests should also be run in the appropriate environments, to avoid the “it-ran-fine-on-my-machine” excuse later.
Hard-coded values often indicate hasty development. Sometimes, they aren’t a big problem, but they can cripple an automation code base’s flexibility. I always ask the following questions when I see a hard-coded value:
Should this be a shared constant?
Should this be a parameterized value for the method/function/step using it?
Should this be passed into the test as an external input (such as from a config file or the command line)?
#7: Incorrect Test Coverage
It is surprisingly common to see an automated test that doesn’t actually cover the intended test steps. A step from the test procedure may be missing, or an assertion may yield a false positive. Sometimes, assertions may not even be performed! When reviewing tests, keep the original test procedure handy, and watch out for missing coverage.
#6: Inadequate Documentation
Documentation is vital for good testing and good maintenance. When a test fails, the doc it provides (both in the logs it prints and in its very own code) significantly assist triage. Automated test cases should read like test procedures. This is one reason why self-documenting behavior-driven test frameworks are so popular. Even without BDD, test automation should be flush with comments and self-documenting identifiers. If I cannot understand a test by skimming its code in a code review, then I ask questions, and when the author provides answers, I ask them to add their answers as comments to the code.
#5: Poor Code Placement
Automation projects tend to grow fast. Along with new tests, new shared code like page objects and data models are added all the time. Maintaining a good, organized structure is necessary for project scalability and teamwork. Test cases should be organized by feature area. Common code should be abstracted from test cases and put into shared libraries. Framework-level code for things like inputs and logging should be separated from test-level code. If code is put in the wrong place, it could be difficult to find or reuse. It could also create a dependency nightmare. For example, non-web tests should not have a dependency on Selenium WebDriver. Make sure new code is put in the right place.
#4: Bad Config Changes
Even the most seemingly innocuous configuration tweak can have huge impacts:
A username change can cause tests to abort setup.
A bad URL can direct a test to the wrong site.
Committing local config files to version control can cause other teammates’ local projects to fail to build.
Changing test input values may invalidate test runs.
One time, I brought down a whole continuous integration pipeline by removing one dependency.
As a general rule, submit any config changes in a separate code review from other changes, and provide a thorough explanation to the reviewers for why the change is needed. Any time I see unusual config changes, I always call them out.
#3: Framework Hacks
A framework is meant to help engineers automate tests. However, sometimes the framework may also be a hindrance. Rather than improve the framework design, many engineers will try to hack around the framework. Sometimes, the framework may already provide the desired feature! I’ve seen this very commonly with dependency injection – people just don’t know how to use it. Hacks should be avoided because test automation projects need a strong overall design strategy.
#2: Brittleness
Test automation must be robust enough to handle bumps in the road. However, test logic is not always written to handle slightly unexpected cases. Here are a few examples of brittleness to watch out for in review:
Do test cases have adequate cleanup routines, even when they crash?
Are all exceptions handled properly, even unexpected ones?
Is Selenium WebDriver always disposed?
Will SSH connections be automatically reconnected if dropped?
Are XPaths too loose or too strict?
Is a REST API response code of 201 just as good as 200?
#1: Duplication
Duplication is the #1 problem for test automation. I wrote a whole article about it: Why is Automation Full of Duplicate Code? Many testing operations are inherently repetitive. Engineers sometimes just copy-paste code blocks, rather than seek existing methods or add new helpers, to save development time. Plus, it can be difficult to find reusable parts that meet immediate needs in a large code base. Nevertheless, good code reviews should catch code redundancy and suggest better solutions.
Please let me know in the comments section if there are any other specific things you look for when reviewing test automation code!
How can lessons from Pokémon apply to software testing and automation?
It’s no secret that I’m a lifelong Nintendo fanboy, and one of my favorite game franchises is Pokémon. Since Christmas, I have been playing the latest installment in the series, Pokémon Moon. The basic gameplay in all Pokémon games is to capture “pocket monsters” in the wild and train them for competitive battles. The main quest is to become the Pokémon League Champion by defeating the strongest trainers in the land. However, as any child of the ’90s will recall, the other major goal of the game is to catch all species of Pokémon. With 300 unique species in the latest installment, that’s no small feat. I can proudly say that I caught ’em all in Pokémon Moon.
It may seem strange to talk about video games on a professional blog, but I see five major parallels between catching Pokémon and my career in software quality and automation.
#1: As QA, We Gotta Catch ’em All
It is the quality engineer’s job to find and resolve all software problems: bugs, defects, design flaws, bad code check-ins, test failures, environment instabilities, deployment hiccups, and even automation crashes. We get paid to make sure things are good. And if we don’t catch a problem, then we haven’t done our jobs right.
#2: Coverage is Key to Success
One of the reasons to catch new Pokémon is not just to make the game’s Pokémon Professor happy for “scientific research,” but moreover to find stronger monsters to assist with the quest. Likewise, more test coverage means more problems discovered, which assists our quest to guarantee product quality. Our goal should be to achieve as close to complete test coverage as reasonably possible. When necessary, we should use risk-based approaches to smartly minimize test gaps as well. And our tests should be strong enough to legitimately exercise the features under test.
#3: Automating Tests Takes Time
As my trainer passport shows, it took me over 100 hours of gameplay to catch all 300 Pokémon. That’s a serious time investment. Test automation is the same way: it takes time to automate tests properly. It requires a robust, scalable, and extendable framework upon which to build test cases. Test automation is a software product in its own right that requires the same best practices and discipline as the product it tests. Software teams must allocate resources to its development and maintenance. It’s not as simple as just “writing test scripts.” However, when done right, the investment pays off.
#4: Not All Tests are Equal
Test metrics like “X passed and Y failed” or “N% of tests automated” can be very misleading because they do not account for differences between tests. Some tests have more coverage than others. Some require more time to run. Some require more time to automate. For example, 100 tests for feature A may take a day to automate and run in 3 minutes, while 5 tests for feature B may take a full week to automate and run in 3 hours. Yet, feature A may still be more important. All Pokémon are likewise not created equal. Some are simply given to you (like Rowlet, Litten, and Popplio), while others take hours of searching to find (like Castform) or are simply too tough to capture without a hard fight (like the Ultra Beasts). Be mindful of test differences for planning, execution, and reporting.
#5: Never Leave Work Incomplete
As a completionist, I would not consider my Pokémon adventure complete without a full Pokédex. There is great satisfaction in accomplishing the full measure of a goal. The same thing goes for testing and automation: my job is not done until all tests are automated and all lines are green. At times, it may be easy to give up because that “Ultra Beast” just won’t cooperate, but it’s the job to catch it. Always complete the ‘dex; always complete the job.
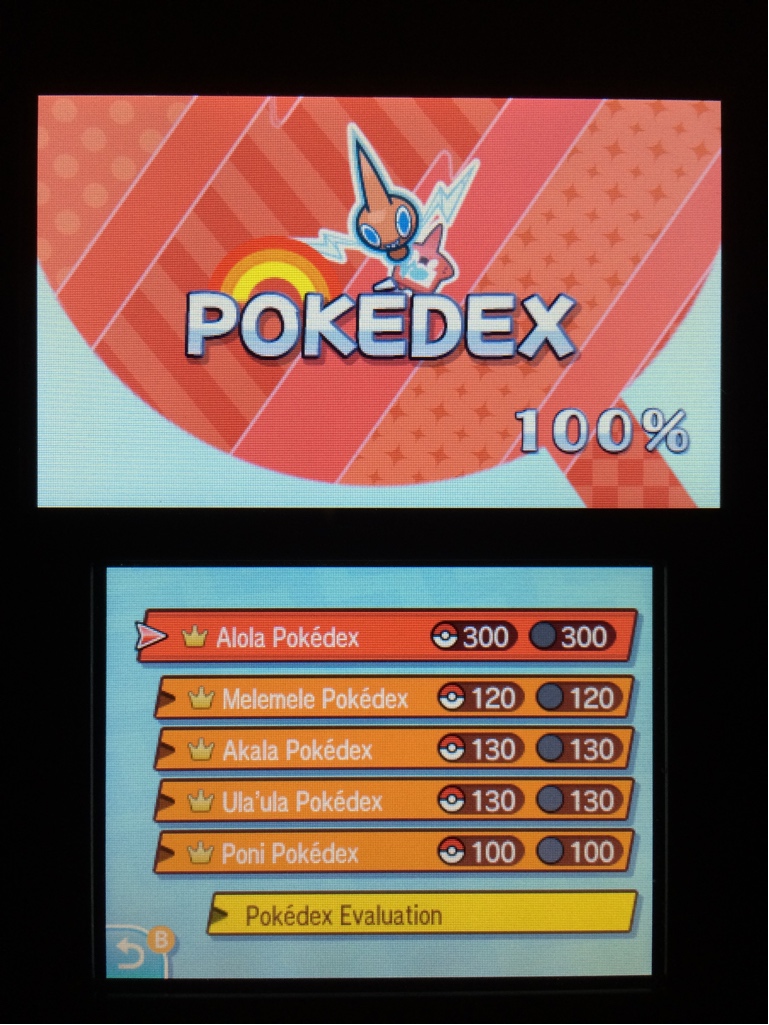
Pokédex Proof
Here’s the proof that I caught ’em all:
The “Pokédex” is a device that indexes all of the Pokémon captured by a trainer. Mine is 100% complete!
Here’s the stamp in my trainer passport to prove it!
If you see any more parallels between Pokémon and QA, please add them to the comments section below!
pytest is an awesome Python test framework. According to its homepage:
pytest is a mature full-featured Python testing tool that helps you write better programs.
Pytests may be written either as functions or as methods in classes – unlike unittest, which forces tests to be inside classes. Test classes must be named “Test*”, and test functions/methods must be named “test_*”. Test classes also need not inherit from unittest.TestCase or any other base class. Thus, pytests tend to be more concise and more Pythonic. pytest can also run unittest and nose tests.
pytest provides many advanced test framework features:
The modules containing pytests should be named “test_*.py” or “*_test.py”. While the pytestdiscovery mechanism can find tests anywhere, pytests must be placed into separate directories from the product code packages. These directories may either be under the project root or under the Python package. However, the pytest directories must not be Python packages themselves, meaning that they should not have “__init__.py” files. (My recommendation is to put all pytests under “[project root]/tests”.) Test configuration may be added to configuration files, which may go by the names “pytest.ini”, “tox.ini”, or “setup.cfg”.
The pytest.ini file is simply a configuration file stub. Feel free to add contents for local testing needs.
This file contains hidden or bidirectional Unicode text that may be interpreted or compiled differently than what appears below. To review, open the file in an editor that reveals hidden Unicode characters. Learn more about bidirectional Unicode characters
The com.automationpanda.example.calc_func module contains basic math functions.
This file contains hidden or bidirectional Unicode text that may be interpreted or compiled differently than what appears below. To review, open the file in an editor that reveals hidden Unicode characters. Learn more about bidirectional Unicode characters
The calc_func tests located in tests/test_calc_func.py are written as functions. Test functions are preferable to test classes when testing functions without side effects.
This file contains hidden or bidirectional Unicode text that may be interpreted or compiled differently than what appears below. To review, open the file in an editor that reveals hidden Unicode characters. Learn more about bidirectional Unicode characters
This file contains hidden or bidirectional Unicode text that may be interpreted or compiled differently than what appears below. To review, open the file in an editor that reveals hidden Unicode characters. Learn more about bidirectional Unicode characters
This file contains hidden or bidirectional Unicode text that may be interpreted or compiled differently than what appears below. To review, open the file in an editor that reveals hidden Unicode characters. Learn more about bidirectional Unicode characters
The com.automationpanda.example.calc_class module contains the Calculator class, which uses the math functions from calc_func. Keeping the functional spirit, the private _do_math method takes in a reference to the math function for greater code reusability.
This file contains hidden or bidirectional Unicode text that may be interpreted or compiled differently than what appears below. To review, open the file in an editor that reveals hidden Unicode characters. Learn more about bidirectional Unicode characters
While tests for the Calculator class could be written using a test class, pytest test functions are just as capable. Fixtures enable a more fine-tuned setup/cleanup mechanism than the typical xUnit-like methods found in test classes. Fixtures can also be used in conjunction with parameterized methods. The tests/test_calc_class.py module is very similar to tests/test_calc_func.py and shows how to use fixtures for testing a class.
This file contains hidden or bidirectional Unicode text that may be interpreted or compiled differently than what appears below. To review, open the file in an editor that reveals hidden Unicode characters. Learn more about bidirectional Unicode characters
Personally, I prefer to write pytests as functions because they are usually cleaner and more flexible than classes. Plus, test functions appeal to my affinity for functional programming.
Test Launch
Basic Test Execution
pytest has a very powerful command line for launching tests. Simply run the pytest module from within the project root directory, and pytest will automatically discover tests.
# Find and run all pytests from the current directory
python -m pytest

# Run pytests under a given path
python -m pytest

# Run pytests in a specific module
python -m pytest tests/test_calc_func.py

# Generate JUnit-style XML test reports
python -m pytest --junitxml=[path-to-file]

# Get command help
python -m pytest -h
pytest also provides shorter “pytest” and “py.test” command that may be run instead of the longer “python -m pytest” module form. However, the shorter commands do not append the current path to PYTHONPATH, meaning modules under test may not be importable. Make sure to update PYTHONPATH before using the shorter commands.
# Update the Python path
PYTHONPATH=$PYTHONPATH:.

# Discover and run tests using the shorter command
pytest
Code Coverage
To run code coverage with the pytest-cov plugin module, use the following command. The report types are optional, but all four types are show below. Specific paths for each report may be appended using “:”.
Parallel testing is vital for more intense testing, such as web testing. The pytest-xdist plugin makes it possible both to scale-up tests by running more than one test process and to scale-out by running tests on other machines. (As a prerequisite, machines need rsync and SSH.) The command below shows how to run multiple test sub-processes; refer to official documentation for multi-machine setup
I’ll say it again: pytest is awesome. It is a powerful test framework with many features, yet its tests are concise and readable. It is very popular and actively supported for both versions of Python. It can handle testing at the unit, integration, and end-to-end levels. It can also be extended with plugins, notably ones for code coverage, parallel execution, and BDD. The only challenge with pytest is that advanced features (namely fixtures) have a learning curve.
My recommendation is to use pytest for standard functional testing in Python. It is one of the best and most popular test frameworks available, and it beats the pants off of alternatives like unittest and nose. pytest is my go-to Python framework, period.
This article is meant to be an introduction. Check out Python Testing with pytest by Brian Okken for deeper study.
Update: On 4/21/2018, I added pytest-xdist and pytest-bdd plugins, and I made some cosmetic changes.
Update: On 7/29/2018, I added the book recommendation for “Python Testing with pytest.”
doctest is a rather unique Python test framework: it turns documented Python statements into test cases. Doctests may be written in two places:
Directly in the docstrings of the module under test
In separate text files (potentially for better organization)
The doctest module searches for examples (lines starting with “>>>”) and runs them as if they were interactive sessions entered into a Python shell. The subsequent lines, until the next “>>>” or a blank line, contain the expected output. A doctest will fail if the actual output does not match the expected output verbatim (e.g., string equality).
The doctest module is included out-of-the-box with Python 2 and 3. Like unittest, it can generate XML reports using unittest-xml-reporting.
Installation
doctest does not need any special installation because it comes with Python. However, the unittest-xml-reporting module may be installed with pip if needed:
> pip install unittest-xml-reporting
Project Structure
When doctests are embedded into docstrings, no structural differences are needed. However, if doctests are written as separate text files, then text files should be put under a directory named “doctests”. It may be prudent to create subdirectories that align with the Python package names. Doctest text files should be named after the modules they cover.
The com.automationpanda.example.calc_func module contains doctests embedded in the docstrings of math functions, alongside other comments:
This file contains hidden or bidirectional Unicode text that may be interpreted or compiled differently than what appears below. To review, open the file in an editor that reveals hidden Unicode characters. Learn more about bidirectional Unicode characters
On the other hand, the com.automationpanda.example.calc_class module contains a Calculator class without doctests in docstrings:
This file contains hidden or bidirectional Unicode text that may be interpreted or compiled differently than what appears below. To review, open the file in an editor that reveals hidden Unicode characters. Learn more about bidirectional Unicode characters
Its doctests are located in a separate text file at doctests/test_calc_class.txt:
This file contains hidden or bidirectional Unicode text that may be interpreted or compiled differently than what appears below. To review, open the file in an editor that reveals hidden Unicode characters. Learn more about bidirectional Unicode characters
Doctests are run in the order in which they are written. The examples above align functions with docstrings and classes with text files, but this is not required. Functions may have doctests in separate text files, and classes may have doctests embedded in method docstrings. Additional tricks are documented online.
Test Launch
To launch tests from the command line, change directory to the project root directory and run the doctest module directly from the python command. Note that doctests use file paths, not module names.
# Run doctests embedded as docstrings
> python -m doctest com/automationpanda/example/calc_func.py

# Run doctests written in separate text files
> python -m doctest doctests/test_calc_class.txt
When doctests run successfully, they don’t print any output! This may be surprising to a first-time user, but no news is good news. However, to force output, include the “-v” option:
# Run doctests with verbose output to print successes as well as failures
> python -m doctest -v com/automationpanda/example/calc_func.py
> python -m doctest -v doctests/test_calc_class.txt
Output should look something like this:
> python -m doctest -v doctests/test_calc_class.txt
Trying:
    from com.automationpanda.example.calc_class import Calculator
Expecting nothing
ok
Trying:
    calc = Calculator()
Expecting nothing
ok
Trying:
    calc.add(3, 2)
Expecting:
    5
ok
...

1 items passed all tests:
  14 tests in test_calc_class.txt
14 tests in 1 items.
14 passed and 0 failed.
Test passed.
doctest has many positive aspects. It is very simple yet powerful, and it has practically no learning curve. Since the doctest module comes with Python out of the box, no extra dependencies are required. It integrates nicely with unittest. Tests can be written in-line with the code, providing not only verification tests but also examples for the reader. And if in-line tests are deemed too messy, they can be moved to separate text files.
However, doctest has limitations. First of all, doctests are not independent: Python commands run sequentially and build upon each other. Thus, doctests may not be run individually, and side effects from one example may affect another. doctest also lacks many features of advanced frameworks, including hooks, assertions, tracing, discovery, replay, and advanced reporting. Theoretically, many of these things could be put into doctests, but they would be inelegantly jury-rigged. Long doctests become cumbersome. Furthermore, console output string-matching is not a robust assertion method. Silent Python statements that do not return a value or print output cannot be legitimately tested. Programmers can easily mistype expected output. Output format might also change in future development, or it may be nondeterministic (like for timestamps).
My main recommendation is this: use doctest for small needs but not big needs. doctest would be a good option for small tools and scripts that need spot checks instead of intense testing. It is also well suited for functional programming testing, in which expressions do not have side effects. Doctests should also be used to provide standard examples in docstrings wherever possible, in conjunction with other tests. Rich documentation is wonderful, and working examples can be a godsend. However, serious testing needs a serious framework, such as pytest or behave.
unittest is the standard Python unit testing framework. Inspired by JUnit, it is included with the standard CPython distribution. unittest provides a base class named TestCase, which provides methods for assertions and setup/cleanup routines. All test case classes must inherit from TestCase. Each method in a TestCase subclass whose name starts with “test” will be run as a test case. Tests can be grouped and loaded using the TestSuite class and load methods, which together can build custom test runners. unittest can also generate XML reports (like JUnit) using unittest-xml-reporting.
unittest is supported in both Python 2 and 3. However, use the unittest2 backport for versions earlier than Python 2.7.
Installation
Basic unittest does not need any special installation because it comes with Python. However, additional modules may be installed with pip if you need them:
Product code modules and unittest test code modules should be placed into separate Python packages within the same project. Test modules must be named “test_*.py” and must be put into packages in order for discovery to work when launching tests. Remember, a Python package is simply a directory with a file named “__init__.py“.
The com.automationpanda.example.calc module contains a Calculator class with basic math methods:
This file contains hidden or bidirectional Unicode text that may be interpreted or compiled differently than what appears below. To review, open the file in an editor that reveals hidden Unicode characters. Learn more about bidirectional Unicode characters
The com.automationpanda.tests.test_calc module contains a unittest.TestCase subclass, shown below. The test class uses the setUp method to construct a Calculator object, which each test method uses. The assertion methods used are assertEqual and assertRaises. A fresh instance of CalculatorTest is instantiated for every test method run.
This file contains hidden or bidirectional Unicode text that may be interpreted or compiled differently than what appears below. To review, open the file in an editor that reveals hidden Unicode characters. Learn more about bidirectional Unicode characters
To launch tests from the command line, change directory to the project root directory and run the unittest module directly from the python command:
# Discover and run all tests in the project
> python -m unittest discover

# Run all tests in the given module
> python -m unittest com.automationpanda.tests.test_calc

# Run all tests in the given test class
> python -m unittest com.automationpanda.tests.test_calc.CalculatorTest

# Run all tests in the given Python file (useful for path completion)
> python -m unittest com/automationpanda/tests/test_calc.py
Test output should look like this:
> python -m unittest discover
.............
----------------------------------------------------------------------
Ran 13 tests in 0.002s

OK
In order to generate XML reports, install unittest-xml-reporting and add the following “main” logic to the bottom of the test case module. The example below will generate the XML report into a directory named “test-reports”.
This file contains hidden or bidirectional Unicode text that may be interpreted or compiled differently than what appears below. To review, open the file in an editor that reveals hidden Unicode characters. Learn more about bidirectional Unicode characters
Then, run the test module directly from the command line:
# Run the test module directly
# Do this whenever "main" logic is written to run a test
# Examples: XML results file, custom test suites
> python -m com.automationpanda.tests.test_calc
Pros and Cons
unittest is “Old Reliable”. It is included out-of-the-box with Python, and it provides a basic, universal test class. Many other test frameworks are compatible with unittest. However, unittest is somewhat clunky: it forces class inheritance instead of allowing functions as test cases. The OOP style feels less Pythonic. Tests cannot be parameterized, either.
My recommendation is to use unittest if you need a basic unit test framework with no additional dependencies. Otherwise, there are better test frameworks available, such as pytest.
Python is an amazing programming language. Loved by beginners and experts alike, it is consistently ranked as one of the most in-demand languages today. At PyData Carolinas 2016, Josh Howes, a senior data science manager at MaxPoint at the time, described Python like this (in rough paraphrase):
Python is a magical tool that easily lets you solve the world’s toughest problems.
I first touched Python back in high school more than a decade ago, but I really started using it and loving it in recent years for test automation. This 101 series will teach how to do testing in Python. This introductory post will give basic orientation, and each subsequent post will focus on a different Python test framework in depth.
Why Use Python for Testing?
As mentioned in another post, The Best Programming Language for Test Automation, Python is concise, elegant, and readable – the precise attributes needed to effectively turn test cases into test scripts. It has richly-supported test packages to deftly handle both white-box and black-box testing. It is also command-line-friendly. Engineers who have never used Python tend to learn it quickly.
The following examples illustrate ways to use Python for test automation:
A developer embedding quick checks into function docstrings.
A developer writing unit tests for a module or package.
Remember, Python can be used for any black-box testing, even if the software product under test isn’t written in Python!
Python Version
Choosing the right Python installation itself is no small decision. For an in-depth analysis, please refer to Which Version of Python Should I Use? Tl;dr:
For white-box testing, use the matching Python version.
For black-box testing, use CPython version 3 if not otherwise constrained.
Unless otherwise stated, this 101 series uses CPython 3.
Consider the type of testing. Basic unit tests could be handled by unittest or even doctest, but higher-level testing would do better with other frameworks like pytest. BDD testing would require behave, lettuce, or radish.
Consider the supported Python version. Python 2 and 3 are two different languages, with Python 2’s end-of-life slated for 2020. Different frameworks have different levels of version support, which could become especially problematic for white-box testing. Furthermore, some may have different features between Python versions.
Consider support and development. Typically, it is best to choose mature, actively-developed frameworks for future sustainability. For example, the once-popular nose is now deprecated.
Future posts in this series will document many frameworks in detail to empower you, as the reader, to pick the best one for your needs.
Virtual Environments
A virtual environment (VE) is like a local Python installation with a specific package set. Tools like venv (Python 3.3+), virtualenv (Python 2 and 3), and Conda (Python 2 and 3; for data scientists) make it easy to create virtual environments from the command line. Pipenv goes a step further by combining VE management with simple-yet-sophisticated package management. Creating at least one separate VE for each Python project is typically a good practice. VEs are extremely useful for test automation because:
VEs allow engineers to maintain multiple Python environments simultaneously.
Engineers can develop and test packages for both versions of Python.
Engineers can separate projects that rely on different package versions.
VEs allow users to install Python packages locally without changing global installations.
Users may not have permissions to install packages globally.
Global changes may disrupt other dependent Python software.
VEs can import and export package lists for easy reconstruction.
VEs become especially valuable in continuous integration and deployment because they can easily provide Python consistency. For example, a Jenkins build job can create a VE, install dependencies from PyPI in the VE, run Python tests, and safely tear down. Once the product under test is ready to be deployed, the same VE configuration can be used.
Recommended IDEs
Any serious test automation work needs an equally serious IDE. My favorite is JetBrains PyCharm. I really like its slick interface and intuitive nature, and it provides out-of-the-box support for a number of Python test frameworks. PyCharm may be downloaded as a standalone IDE or a plugin for JetBrains IntelliJ IDEA. The Community Edition is free and meets most automation needs, while the Professional Edition requires a license. PyDev is a nice alternative for those who prefer Eclipse. Eric satisfies the purists for being a Python IDE written in Python. While all three have a plugin framework, PyCharm and PyDev seem to take the advantage in popularity and support. There’s also the classic IDLE, but its use is strongly discouraged nowadays, due to bugs and better options.
Lightweight text editors can make small edits easy and fast. Visual Studio Code is a recent favorite. Notepad++ is always a winner on Windows. Atom is a newer, cross-platform editor developed by GitHub that’s gaining popularity. Of course, UNIX platforms typically provide vim or emacs.
Framework Survey
If this series is for you, then install an IDE, set up a virtual environment, and let’s roll! The next posts will each introduce a popular Python test framework.Each post should be used as an introduction for getting started or as a quick reference. Please refer to official framework documentation for full details – it would be imprudent for this blog to unnecessarily duplicate information.
Almost all BDD automation frameworks have some sort of hooks that run before and after scenarios. However, not all frameworks have global hooks that run once at the beginning or end of a suite of scenarios – and Cucumber-JVM is one of these unlucky few. Cucumber-JVM GitHub Issue #515, which seeks to add @BeforeAll and @AfterAll hooks, has been open and active since 2013, but it looks unclear if the issue will ever be resolved. Thankfully, there are some workarounds to effect the same behavior as global hooks.
Workaround #1: Don’t Do It
From a purist’s perspective, each scenario (or test) should be completely independent, meaning it should not share parts with any other tests. Independence provides the following benefits:
Safety between tests
Consistency across tests
The ability to run any tests individually, in any order, or in parallel
More sensible, understandable tests
If not handled properly, global hooks can be dangerous because they make tests interdependent. Changes or failures in one test may cascade into others. Global test data would waste memory for tests that don’t use it. Furthermore, the fact that Issue #515 has been open for years indicates the difficulty of properly implementing global hooks.
However, the main cost of independence is runtime. Independent tests often repeat similar setup and cleanup routines. Even a few extra seconds per test can add up tremendously. Google Guava, for example, has over 286,000 tests – adding one second to each test would amount to nearly 80 hours! Performance becomes especially critical for continuous integration, in which wasted time means either delivery delays or coverage gaps. Certain operations like preparing a database or fetching authentication tokens may be pragmatic candidates for global hooks.
The best strategy is to use global hooks only when necessary for time-intensive setup that can be shared safely. Any shared test data should be immutable. Always question the need for global hooks. Most tests probably won’t need them.
Workaround #2: Static Variables
A basic hack for global hooks is actually provided in Issue #515. A static Boolean flag can indicate when the @Before hook has run more than once because it isn’t “reset” when a new scenario re-instantiates the step definition classes. The runtime shutdown hook will be called once all tests are done and the program exits. (Note that a static flag cannot be used in an @After hook due to the halting problem.) The example from the issue is shamelessly copied below:
publicclass GlobalHooks {privatestaticboolean dunit =false;@Before
publicvoid beforeAll(){if(!dunit){Runtime.getRuntime().addShutdownHook(afterAllThread);// do the beforeAll stuff...
dunit =true;}}}
Workaround #3: Singleton Caching
The basic hack is useful for simple setup and cleanup routines, but it becomes inelegant when objects must be shared by scenarios. Rather than polluting the class with static members, a singleton can cache test data between scenarios, and global setup logic may be put into the singleton’s constructor. Furthermore, if the singleton uses lazy initialization, then @Before hooks may not be needed at all. A “lazy” singleton will not be instantiated until the first time its getInstance method is called, meaning it will be skipped if the scenarios do not need them. This is a huge advantage when selectively running scenarios by name, tag, or feature. (Please refer to the previous post, Static or Singleton, for a deeper explanation of the singleton pattern.)
Consider scenarios that must generate authentication tokens (like OAuth) for API testing. A singleton “token holder” could cache tokens for usernames, rather than doing the authorization dance for every scenario. The snippet below shows how such a singleton could be called within a @When step definition with no @Before method.
publicclass ExampleSteps {...@When("^some API is called$")publicvoid whenSomeApiIsCalled(){// Get the token from the singleton cache lazilyString token = TokenHolder.getInstance().getToken("user","pass");// Use the token to call some API (method not shown)
callSomeApi(token);}...}
And the singleton class could be defined like this:
publicclass TokenHolder {privatestaticvolatile TokenHolder instance =null;private HashMap<String,String> tokens;private TokenHolder(){
tokens =new HashMap<String,String>();}publicstatic TokenHolder getInstance(){// Lazy and thread-safeif(instance ==null){synchronized(TokenHolder.class){if(instance ==null){
instance =new TokenHolder();}}}return instance;}publicString getToken(String username,String password){// This check could be extended to handle token expirationif(!tokens.containsKey(username)){// Request a fresh authentication token (method not shown)String token = requestToken(username, password);// Cache the token for later
tokens.put(username, token);}return tokens.get(username);}...}
Workaround #4: JUnit Class Annotations
Another workaround mentioned in Issue #515 and elsewhere is to use JUnit‘s @BeforeClass and @AfterClass annotations in the runner class, like this:
@RunWith(Cucumber.class)
@Cucumber.Options(format = {"html:target/cucumber-html-report","json-pretty:target/cucumber-json-report.json"})
publicclass RunCukesTest {@BeforeClass
publicstaticvoid setup(){System.out.println("Ran the before");}@AfterClass
publicstaticvoid teardown(){System.out.println("Ran the after");}}
While @BeforeClass and @AfterClass may look like the cleanest solution at first, they are not very practical to use. They work only when Cucumber-JVM is set to use the JUnit runner. Other runners, like TestNG, the command line runner, and special IDE runners, won’t pick up these hooks. Their methods must also be are static and would need static variables or singletons to share data anyway. Therefore, I personally discourage using these annotations in Cucumber-JVM.
In software engineering, dependency injection is a technique whereby one object supplies the dependencies of another object. A dependency is an object that can be used (a service). An injection is the passing of a dependency to a dependent object (a client) that would use it. The service is made part of the client’s state. Passing the service to the client, rather than allowing a client to build or find the service, is the fundamental requirement of the pattern.
Dependency injection can be a powerful alternative to singletons because DI provides finer control over the scope of objects. However, Cucumber-JVM’s dependency injection cannot be applied with global hooks because dependency objects, like step definition objects, are constructed and destroyed for each scenario.
Comparison Table
Ultimately, the best approach for global hooks in Cucumber-JVM is the one that best fits the tests’ needs. Below is a table to make workaround comparisons easier.
Workaround
Pros
Cons
Don’t Do It
Scenarios are completely independent. No complicated or risky workarounds.
Repeated setup and cleanup procedures may add significant execution time.
Static Variables
Simple yet effective implementation.
May need many static variables to share test data.
Singleton Caching
Abstracts test data and setup procedures. Easily handles lazy initialization and evaluation. May not need a @Before hook.
More complicated design.
JUnit Class Annotations
Clean look for basic setup and cleanup routines.
May be used only with the JUnit runner. Requires static variables or singletons to share test data anyway.
Every major programming language has a BDD automation framework. Some even have multiple choices. Building upon the structural basics from the previous post, this post provides a survey of the major frameworks available today. Since I cannot possibly cover every BDD framework in depth in this 101 series, my goal is to empower you, the reader, to pick the best framework for your needs. Each framework has support documentation online justifying its unique goodness and detailing how to use it, and I would prefer not to duplicate documentation. Use this post primarily as a reference. (Check the Automation Panda BDD page for the full table of contents.)
Major Frameworks
Most BDD frameworks are Cucumber versions, JBehave derivatives inspired by Dan North, or non-Gherkin spec runners. Some put behavior scenarios into separate files, while others put them directly into the source code.
C# and Microsoft .NET
SpecFlow, created by Gáspár Nagy, is arguably the most popular BDD framework for Microsoft .NET languages. Its tagline is “Cucumber for .NET” – thus fully compliant with Gherkin. SpecFlow also has polished, well-designed hooks, context injection, and parallel execution (especially with test thread affinity). The basic package is free and open source, but SpecFlow also sells licenses for SpecFlow+ extensions. The free version requires a unit test runner like MsTest, NUnit, or xUnit.net in order to run scenarios. This makes SpecFlow flexible but also feels jury-rigged and inelegant. The licensed version provides a slick runner named SpecFlow+ Runner (which is BDD-friendly) and a Microsoft Excel integration tool named SpecFlow+ Excel. Microsoft Visual Studio has extensions for SpecFlow to make development easier.
There are plenty of other BDD frameworks for C# and .NET, too. xBehave.net is an alternative that pairs nicely with xUnit.net. A major difference of xBehave.net is that scenario steps are written directly in the code, instead of in separate text (feature) files. LightBDD bills itself as being more lightweight than other frameworks and basically does some tricks with partial classes to make the code more readable. NSpec is similar to RSpec and Mocha and uses lambda expressions heavily. Concordion offers some interesting ways to write specs, too. NBehave is a JBehave descendant, but the project appears to be dead without any updates since 2014.
Java and JVM Languages
The main Java rivalry is between Cucumber-JVM and JBehave. Cucumber-JVM is the official Cucumber version for Java and other JVM languages (Groovy, Scala, Clojure, etc.). It is fully compliant with Gherkin and generates beautiful reports. The Cucumber-JVM driver can be customized, as well. JBehave is one of the first and foremost BDD frameworks available. It was originally developed by Dan North, the “father of BDD.” However, JBehave is missing key Gherkin features like backgrounds, doc strings, and tags. It was also a pure-Java implementation before Cucumber-JVM existed. Both frameworks are widely used, have plugins for major IDEs, and distribute Maven packages. This popular but older article compares the two in slight favor of JBehave, but I think Cucumber-JVM is better, given its features and support.
The Automation panda article Cucumber-JVM for Java is a thorough guide for the Cucumber-JVM framework.
Java also has a number of other BDD frameworks. JGiven uses a fluent API to spell out scenarios, and pretty HTML reports print the scenarios with the results. It is fairly clean and concise. Spock and JDave are spec frameworks, but JDave has been inactive for years. Scalatest for Scala also has spec-oriented features. Concordion also provides a Java implementation.
JavaScript
Almost all JavaScript BDD frameworks run on Node.js. Jasmine and Mocha are two of the most popular general-purpose JS test frameworks. They differ in that Jasmine has many features included (like assertions and spies) that Mocha does not. This makes Jasmine easier to get started (good for beginners) but makes Mocha more customizable (good for power users). Both claim to be behavior-driven because they structure tests using “describe” and “it-should” phrases in the code, but they do not have the advantage of separate, reusable steps like Gherkin. Personally, I consider Jasmine and Mocha to be behavior-inspired but not fully behavior-driven.
Other BDD frameworks are more true to form. Cucumber provides Cucumber.js for Gherkin-compliant happiness. Yadda is Gherkin-like but with a more flexible syntax. Vows provides a different way to approach behavior using more formalized phrase partitions for a unique form of reusability. The Cucumber blog argues that Cucumber.js is best due to its focus on good communication through plain language steps, whereas other JavaScript BDD frameworks are more code-y. (Keep in mind, though, that Cucumber would naturally boast of its own framework.) Other comparisons are posted here, here, here, and here.
PHP
The two major BDD frameworks for PHP are Behat and Codeception. Behat is the official Cucumber version for PHP, and as such is seen as the more “pure” BDD framework. Codeception is more programmer-focused and can handle other styles of testing. There are plenty of articles comparing the two – here, here, and here (although the last one seems out of date). Both seem like good choices, but Codeception seems more flexible.
Python
Python has a plethora of test frameworks, and many are BDD. behave and lettuce are probably the two most popular players. Feature comparison is analogous to Cucumber-JVM versus JBehave, respectively: behave is practically Gherkin compliant, while lettuce lacks a few language elements. Both have plugins for major IDEs. pytest-bdd is on the rise because it integrates with all the wonderful features of pytest. radish is another framework that extends the Gherkin language to include scenario loops, scenario preconditions, and variables. All these frameworks put scenarios into separate feature files. They all also implement step definitions as functions instead of classes, which not only makes steps feel simpler and more independent, but also avoids unnecessary object construction.
Other Python frameworks exist as well. pyspecs is a spec-oriented framework. Freshen was a BDD plugin for Nose, but both Freshen and Nose are discontinued projects.
Ruby
Cucumber, the gold standard for BDD frameworks, was first implemented in Ruby. Cucumber maintains the official Gherkin language standard, and all Cucumber versions are inspired by the original Ruby version. Spinach bills itself as an enhancement to Cucumber by encapsulating steps better. RSpec is a spec-oriented framework that does not use Gherkin.
Which One is Best?
There is no right answer – the best BDD framework is the one that best fits your needs. However, there are a few points to consider when weighing your options:
What type of testing will you do with the framework?
What are the limitations as compared to other frameworks?
Frameworks that separate scenario text from implementation code are best for shift-left testing. Frameworks that put scenario text directly into the source code are better for white box testing, but they may look confusing to less experienced programmers.
Personally, my favorites are SpecFlow and pytest-bdd. At LexisNexis, I used SpecFlow and Cucumber-JVM. For Python, I used behave at MaxPoint, but I have since fallen in love with pytest-bdd since it piggybacks on the wonderfulness of pytest. (I can’t wait for this open ticket to add pytest-bdd support in PyCharm.) For skill transferability, I recommend Gherkin compliance, as well.
Reference Table
The table below categorizes BDD frameworks by language and type for quick reference. It also includes frameworks in languages not described above. Recommended frameworks are denoted with an asterisk (*). Inactive projects are denoted with an X (x).
Better automation is one of BDD’s hallmark benefits. In fact, the main goal of BDD could be summarized as rapidly turning conceptualized behavior into automatically tested behavior. While the process and the Gherkin are universal, the underlying automation could be built using one of many frameworks.
This post explains how BDD automation frameworks work. It focuses on the general structure of the typical framework – it is not a tutorial on how to use any specific framework. However, I wrote short examples for each piece using Python’s behave framework, since learning is easier with examples. I chose to use Python here simply for its conciseness. (Check the Automation Panda BDD page for the full table of contents.)
Framework Parts
Every BDD automation framework has five major pieces:
#1: Feature Files
Gherkin feature files are very much part of the automation. They act like test scripts – each scenario is essentially a test case. Previous posts covered Gherkin in depth.
Here is an example feature file named google_search.feature:
Feature: Google Searching
As a web surfer, I want to search Google, so that I can learn new things.
# This scenario should look familiar@automated @google-search @pandaScenario: Simple Google search
Given a web browser is on the Google page
When the search phrase "panda" is entered
Then results for "panda" are shown
#2: Step Definitions
A step definition is a code block that implements the logic to execute a step. It is typically a method or function with the English-y step phrase as an annotation. Step definitions can take in arguments, doc strings, and step tables. They may also make assertions to pass or fail a scenario. In most frameworks, data can be passed between steps using some sort of context object. When a scenario is executed, the driver matches each scenario step phrase to its step definition. (Most frameworks use regular expressions for phrase matching.) Thus, every step in a feature file needs a step definition.
The step definitions would be written in a Python source file like this:
frombehaveimport*@given('a web browser is on the Google page')defstep_impl(context):
context.google_page.load();
@when('the search phrase "{phrase}" is entered')defstep_impl(context, phrase):
context.google_page.search(phrase)
@then('the results for "{phrase}" are shown')defstep_impl(context, phrase):assertcontext.google_page.has_results(phrase)
#3: Hooks
Certain automation logic cannot be handled by step definitions. For example, scenarios may need special setup and cleanup operations. Most BDD frameworks provide hooks that can insert calls before or after Gherkin sections, typically filterable using tags. Hooks are similar in concept to aspect-oriented programming.
In behave, hooks are written in a Python source file named environment.py:
Support code (a.k.a libraries or packages) refers to any code called by step definitions and hooks. Support code could be dependency packages downloaded using managers like Maven (Java), NuGet (.NET), or PyPI (Python). For example, Selenium WebDriver is a well-known package for web browser automation. Support code could also be components to assist automation, such as page objects or other design patterns. As the cliché goes, “Don’t reinvent the wheel.” Step definitions and hooks should not contain all of the logic for running the actions – they should reuse common code as much as possible.
A Python page object class from the page_objects.py module could look like this:
class GooglePage(object):
"""A page object for the Google home page"""def__init__(self, browser):
self.browser = browserdef load():
# put code herepassdef search(phrase):
# put code herepassdef has_results(phrase):
# put code here
return False
#5: Driver
Every automation framework has a driver that runs tests, and BDD frameworks are no different. The driver executes each scenario in a feature file independently. Whenever a failure happens, the driver reports the failure and aborts the scenario. Drivers typically have discovery mechanisms for selecting scenarios to run based on tag names or file paths.
The behave driver can be launched from the command line like this:
> behave google_search.py --tags @panda
Automation Advantages
Even if a team does not apply behavior-driven practices to its full development process, BDD test frameworks still have some significant advantages over non-BDD test frameworks. First of all, steps make BDD automation very modular and thus reusable. Each step is an independent action, much like how each scenario is an independent behavior. Once a step definition is written, it may be reused by any number of scenarios. This is crucial, since most behaviors for a feature share common actions. And all steps are inherently self-documenting, since they are written in plain language. There is a natural connection between high-level behavior and low-level implementation.
Test execution also has advantages. Tags make it very easy to select tests to run, especially from the command line. Failures are very informative as well. The driver pinpoints precisely which step failed for which scenario. And since behaviors are isolated, a failure for one scenario is less likely to affect other test scenarios than would be the case for procedure-driven tests.
Test data is a huge concern for any automation framework. Simple test data values may be supplied directly in Gherkin as step arguments or table values, but larger test data sets require other strategies. Support code can be used to handle test data. Read BDD 101: Test Data for more information.
Available Frameworks
There are many BDD frameworks out there. The next post will introduce a few major frameworks for popular languages.